A simple daily makeup routine helps skin look fresh and polished with minimal effort. Start with clean, moisturized skin, choose a lightweight tint that matches your tone, and use concealer only where extra coverage is needed. Finish with a touch of translucent powder to set everything without looking cakey. Small techniques-like blending downward and using thin layers-keep the look natural and quick.
Gather Your Makeup Essentials
Before you even touch a brush, gather a few simple makeup essentials so the rest of your routine feels easy instead of stressful.
Start with makeup bag essentials like a tinted base, concealer, mascara, lip color, and a cream blush. Then add makeup brush basics, including a buffing brush, a small concealer brush, and a spoolie for brows.
You don’t need a crowded kit to fit in or look polished. A few well-chosen tools can help you feel confident, prepared, and part of the moment.
Keep everything in one pouch, so you can reach for what you need without digging around. If you like, choose products that multitask, because less clutter makes learning makeup feel friendlier and way less overwhelming.
Prep Your Skin Before Makeup
Your makeup will look smoother and last longer if you give your skin a little care before you start, and that part does not need to feel fussy. Start with gentle cleansing to lift oil, sweat, and overnight residue without stripping your face. Then move into hydrating prep so your skin feels calm and ready.
| Step | What you do | Why it helps |
|---|---|---|
| 1 | Cleanse gently | Clears buildup |
| 2 | Pat dry | Keeps skin comfy |
| 3 | Moisturize | Softens texture |
| 4 | Eye cream | Freshens under-eyes |
| 5 | Wait a minute | Helps products settle |
If you prep this way, you’re not doing extra work. You’re giving your routine a friendlier start, so you can feel polished and at ease with less effort.
Apply a Lightweight Foundation or Skin Tint
A lightweight foundation or skin tint can make makeup feel easy, especially whenever you want coverage without that heavy, cakey feeling.
You’re not trying to hide yourself; you’re just smoothing things out. Pick lightweight coverage options that match your skin tone, then dot a little across your forehead, cheeks, and chin. Blend with clean fingers for a fast, friendly finish, or use a brush if you want more polish.
Many skin tint formulas also add a soft glow, so your skin still looks like skin. If the color seems right at first glance, check it in daylight before you head out. Then build only where you need it, so your face feels comfortable, fresh, and confidently yours.
Use Concealer Where You Need It
Once your base is set, concealer becomes the small fix that can change the whole face. You don’t need to cover everything; you just help the spots that still need care. Consider of it like joining the team, not taking over.
- Tap a little under your eyes for under eye correction.
- Dab it on redness, spots, or around the nose.
- Build coverage with concealer layering, using thin touches initial.
- Blend the edges so it melts into your skin.
Use a shade that matches your base for blemishes and one that’s slightly brighter for tired areas. Keep your hand light, and trust that small fixes can make you look fresh without hiding who you are.
Set Your Base With Powder
Powder helps lock in the work you just did with concealer, so your base stays smooth instead of sliding around before noon. You only need a light veil, because too much can make your skin look dry or heavy. Pick a setting powder that matches your skin tone, then tap a small amount into the cap.
Use a fluffy brush to press it over your T-zone, under your eyes, and around your nose. This step gives you gentle oil control without stealing the fresh look you want. Whenever your skin feels drier, focus on the spots that get shiny earliest. Keep the pressure soft, and let the powder do its quiet job. You’ll look polished, comfortable, and ready to step out with confidence.
Add a Natural Flush With Blush
Choose a blush shade that looks like your skin after a quick walk, because that natural color will feel the most believable on you.
Place it high on the apples of your cheeks and sweep it slightly upward for a soft lift instead of a heavy stripe.
Then blend the edges well so the color melts into your base and leaves you with a fresh, easy glow.
Choosing A Flattering Shade
Whenever you’re picking a blush shade, the goal is to make your cheeks look naturally alive, not obviously painted.
Start by checking your shade undertone, because warm, cool, and neutral tones can change how color reads on your skin. Then consider your seasonal color, since the right family can make you look rested and fresh, like you slept eight hours and actually meant it.
- For fair skin, try soft pink or peach.
- For medium skin, choose rose or coral.
- For deep skin, reach for berry or terracotta.
- For olive skin, try apricot or muted mauve.
You don’t need the “perfect” shade on day one. Swatch a few, step back, and pick the one that makes you feel like you belong in your own face.
Placement For Natural Color
To make blush look natural, place it where your face already tends to lift and warm up on its own. Tap color on the apples of your cheeks, then guide it slightly upward toward the temples for a soft natural placement. This keeps your cheeks looking lively, not painted on.
Whenever your face is round, start a little higher. Whenever it’s longer, keep the color closer to the center for better color balance. You can smile initially, but don’t hold the grin while applying.
Instead, relax your face and follow the shape you see. Use a light hand and build slowly, so you stay in control and still look like yourself, just fresher and more awake.
Blending For Soft Finish
A soft blush finish starts with how you move the product, because the right blend can make your cheeks look naturally alive instead of heavily made up. You want to feel like you belong in your own skin, not like you borrowed someone else’s makeup bag. Start with a small amount, then build slowly so the color melts in.
Use these steps for soft blending and seamless diffusion:
- Tap blush onto the apples of your cheeks.
- Sweep outward with light, short motions.
- Use a clean finger or sponge to blur edges.
- Check both sides in natural light.
When you soften the border, your blush looks fresh, friendly, and real. That gentle wash helps your whole routine feel polished without losing your easy, everyday vibe.
Fill In Your Brows Naturally
Full brows can change your whole face, and the positive news is you don’t need a heavy hand to get there.
Start with an eyebrow pencil or gel that matches your hair and has a creamy brow product texture, so it glides on without looking harsh. Use short, light strokes where hair is sparse, then brush through with a spoolie to soften every mark.
For soft arch shaping, follow your natural brow line and lift only a little at the highest point. This keeps your look friendly and polished, not drawn on.
Should you go slowly, you’ll feel more at home in your routine and less like you’re trying to wear someone else’s face. A few careful touches can make you look awake, neat, and confidently you.
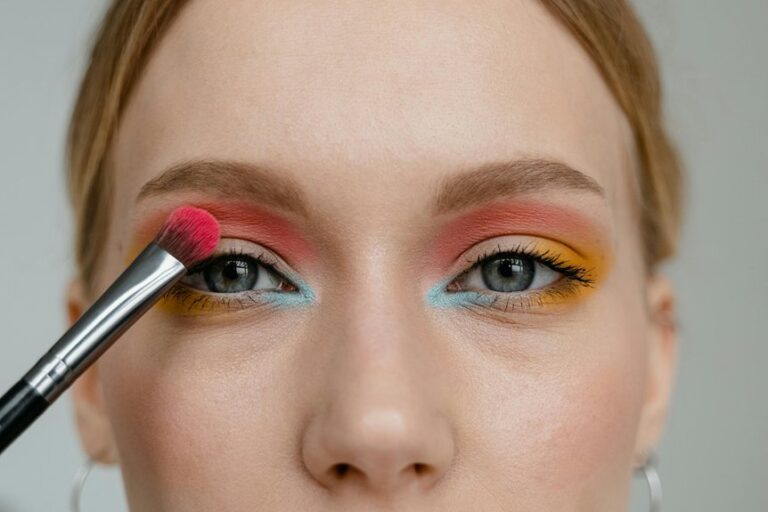
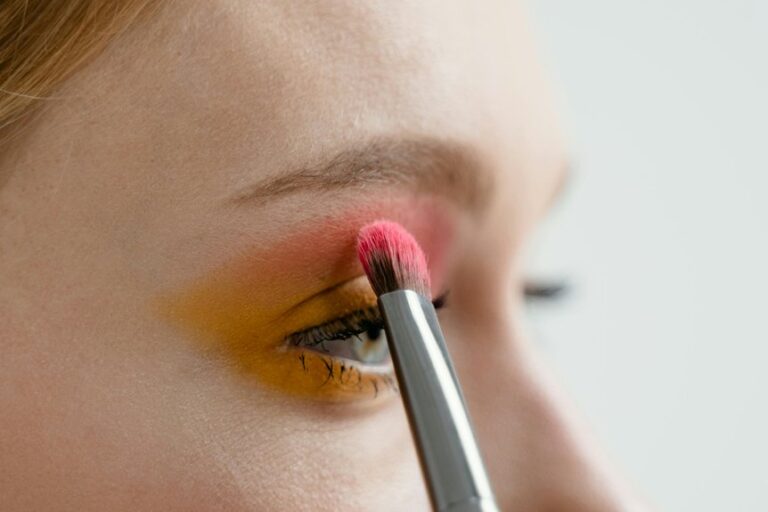
Try Simple Eye Makeup Looks
Whenever you want your eyes to look brighter without spending forever in front of the mirror, start with a few simple steps that feel easy to repeat. You can keep it friendly and low-stress, so your routine still feels like yours. To begin, pick one shade that flatters you, then build from there.
- Sweep a soft taupe across your lid for easy depth.
- Add soft shimmer looks to the center, so your eyes catch light.
- Tap color pop accents near the inner corner whenever you want a little fun.
- Blend the edges with a clean finger for a smooth finish.
Whenever you keep it simple, you fit right in with a polished daily look, and you won’t feel lost in a crowded makeup bag.
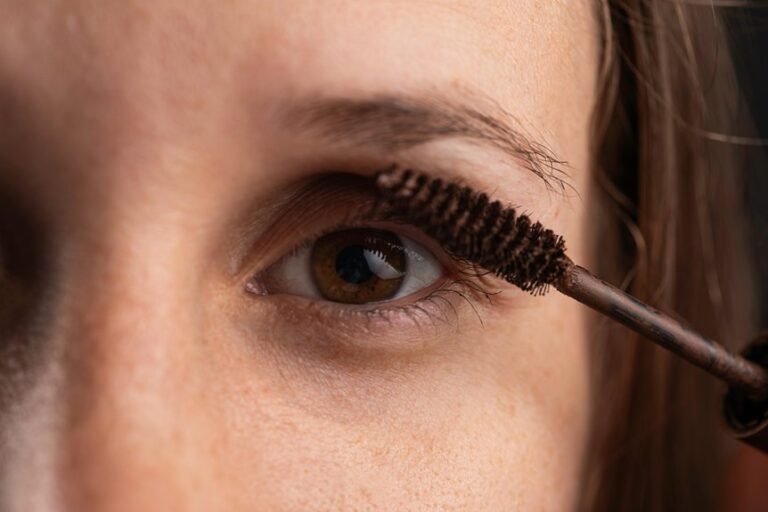
Make Your Lashes Look Fuller
Curl your lashes initially so your eyes open up right away and your mascara has a better base to grip.
Then apply mascara lightly, using small, careful strokes so your lashes look fuller without getting clumpy.
To finish, define your lash line with a soft pencil or tightline technique, because that little extra shadow makes your lashes look even denser.
Curl Lashes First
Before you reach for mascara, give your lashes a quick curl, because that small step can make your eyes look wider, brighter, and more awake in seconds. You’ll fit right in with an easy routine whenever you place eyelash curler safety first and keep the curler near the base without pinching skin.
- Warm the curler in your hands, then check lash curl timing before you start.
- Open your eyes wide and set the pads close to the roots.
- Press gently, hold for a few seconds, and release.
- Move to the middle for a softer bend that looks natural.
When you curl first, your lashes lift cleanly, so your whole eye area feels polished and ready. It’s a small habit, but it makes your everyday look feel put together.
Apply Mascara Lightly
Sweep on mascara with a light hand, and your lashes can look fuller without feeling heavy or clumpy. You don’t need lots of product to fit in with polished, everyday beauty.
Start at the base of your lashes and move upward in small wiggles, then stop before the second coat gets too bold. A light mascara keeps your eyes open and fresh, while soft lash separation helps each lash stand out.
Should you see tiny clumps, use the clean tip of the wand to brush them away right away. You can also tap off extra product before applying it.
With this easy touch, you’ll look put together, confident, and ready for the day, whether you’re headed to class, work, or coffee with friends.
Define Lash Line
A soft mascara coat can make your eyes look awake, and a defined lash line takes that effect even further with filling in the tiny gaps right at the roots. You don’t need heavy liner. Instead, work close to the lash line anatomy so the color disappears into the base of your lashes. For clean lash line definition, try this:
- Lift the lid gently.
- Tap a pencil between lashes.
- Smudge with a tiny brush.
- Check both eyes in daylight.
This step makes your lashes look fuller, and you still look like you. Should you’ve ever wanted that easy, “I belong in this room” glow, this tiny trick helps you get there. Keep your hand light, and let the root area do the quiet work.
Choose a Natural Lip Color
Often, the best lip color is the one that looks like your lips, only a little more polished. You can pick a soft rose, peach, beige pink, or sheer berry and still feel like yourself. That matters whenever you want to look put together without feeling overdone.
| Shade | Effect |
|---|---|
| Rose | Fresh and friendly |
| Peach | Warm and easy |
| Beige pink | Soft and clean |
| Berry tint | Natural depth |
| Clear balm | Simple shine |
Try lip tint options whenever you want color that stays close to your own tone. If you like shine, choose everyday gloss finishes that catch light without shouting for attention. You’ll look polished, relaxed, and right at home with the rest of your routine.
Build a Simple 5-Minute Routine
At the point that you only have five minutes, the goal isn’t perfection, it’s looking fresh, pulled together, and still like you. Your quick routine should feel easy, so you can join the day without stress.
- Start with a tinted moisturizer or light foundation.
- Add concealer only where you need it, like under eyes or spots.
- Sweep on cream blush and a little mascara.
- Finish with brows and a soft lip color.
These time saving tips help you move fast and still look cared for.
Unless you keep your products close together, you’ll waste less time hunting.
Also, use your fingers during the moments you’re rushed, since they blend quickly and keep things simple.
With a few steady steps, you can get ready and still feel like part of the room.
Match Makeup to Your Skin Type
Your skin type should guide every makeup choice you make, because the right products can make your face look smoother, fresher, and more comfortable all day. Start with skin type basics: whenever you’re dry, look for creamy, hydrating formulas that won’t cling to flakes. Whenever you’re oily, choose light, oil-free products that help keep shine calm.
For combination skin, mix textures so each area gets what it needs. Next, focus on product texture matching. A dewy tint can feel lovely on dry skin, while a soft matte concealer could suit oily spots better. As you match texture to your skin, makeup sits better, blends easier, and feels more like you. That little fit can make getting ready feel easier and more welcoming every morning.
Avoid Common Beginner Makeup Mistakes
One of the easiest beginner makeup mistakes is picking a foundation shade that doesn’t really match your skin, and that can make everything else look off.
You can avoid that by checking the color in natural light and choosing a formula that fits your skin type too.
Once your base looks right, blend it well so your makeup looks smooth, fresh, and like you, just a little more polished.
Matching Foundation Correctly
Getting the right foundation shade can feel tricky, but it gets much easier once you know what to look for. You’ll fit in faster while your base matches your skin, not just your neck. Start with undertone analysis in natural light so you can see whether your skin leans warm, cool, or neutral. Then examine a few shades with shade swatch placement along your jawline, not on your hand. Let the color sit for a minute, because some formulas shift a little.
- Check daylight, not store lights.
- Compare two close shades.
- Match the center of your face.
- Pick the one that disappears best.
Should you be between shades, choose the slightly lighter one and adjust with concealer later. That keeps your routine simple and your look easy to wear.
Blending for a Natural Finish
Even though your makeup looks good in the compact, poor blending can still make it look patchy or heavy on the face. Start with small amounts, then press and sweep the product so it melts into your skin. Use a damp sponge, a dense brush, or clean fingers, and keep the edges soft around your jaw, nose, and hairline.
That’s where beginner makeup mistakes often show up initially. For cheeks and concealer, tap instead of dragging so you keep coverage without streaks. Build color slowly, and check your face in natural light.
As you blend with care, you create a seamless gradient and soft focus blending that helps you look polished, comfortable, and part of your own best beauty routine.
Clean and Store Makeup Properly
Once you clean and store your makeup properly, you protect both your skin and your products at the same time. You also keep your routine easy, calm, and ready for the next day. Good makeup storage helps your favorites stay fresh, and brush hygiene keeps buildup from sneaking onto your face.
- Wash brushes weekly with gentle soap and lukewarm water.
- Let them dry flat so water doesn’t loosen the glue.
- Wipe compacts, tubes, and caps after each use.
- Keep makeup in a cool, dry case or drawer.
After that, sort items according to daily use, so you can grab what you need fast. Whenever everything has a clean place, you’ll feel more at home in your routine, and your makeup will work better for you.