Eyeshadow for beginners can be simple and fun with a few smart basics and the right shades. Start with a clean, dry lid and a small set of brushes or applicators for smooth color payoff. Place a light shade across the lid, a medium hue in the crease, and a darker tone at the outer corner for depth. Knowing where each color belongs makes the process quick and yields a soft, polished look.
Eyeshadow Basics for Beginners
Once you’re just starting with eyeshadow, the basics are all about creating a smooth base and choosing the right tools before you add color.
You’ll feel more at ease once you know your eyeshadow types, because matte shades give soft definition, while shimmer adds brightness.
Next, look at eye shape basics so you can place color where it flatters you most.
A light shade on the lid and a deeper shade in the crease usually works well for beginners.
Keep your strokes gentle and blend as you go, so the colors melt together instead of fighting each other.
Start small, because you can always build more.
With a little practice, you’ll join the crowd of people who make eye makeup look easy.
Essential Eyeshadow Tools
The right tools can make eyeshadow feel a lot less scary, even though you’re still learning and your makeup bag looks a little random right now.
Start with a few eyeshadow brush types: a flat shader brush for packing color, a fluffy blending brush for soft edges, and a small detail brush for the outer corner and lower lash line.
You don’t need a giant kit to belong here; you just need the right shape for the job.
Should a brush feel scratchy or sheds, skip it.
Keep eyeshadow tool care simple since washing brushes often with gentle soap, then letting them dry flat.
Clean tools help color go on smoother, and they help you feel more confident too, one easy swipe at a time.
Prep Your Eyelids for a Smooth Base
A smooth eye look starts before any color goes on, because a well-prepped lid gives your shadows something to grip. You don’t need fancy skills; you just need a clean, even surface that feels like it belongs to you.
Try these eyeshadow priming methods to keep pigment in place and stop creasing:
- Gently remove oil with a soft wipe.
- Smooth a thin layer of primer from inner to outer lid.
- Blend it with a concealer brush.
- Use a concealer and powder base whenever you want extra coverage.
- Set the lid and under-eye area with translucent powder.
This step gives you a calm, fresh canvas, so your next shadow blends easier and lasts longer. With a little prep, your eye makeup starts strong and stays comfy all day.
Choose Eyeshadow Shades That Flatter You
Now that your lids are smooth and set, you can pick shades that make your eyes look brighter, softer, or more striking without guesswork. Start with your eye color, then look at shade undertones.
Warm browns, peach, and gold can wake up blue eyes, while plum and olive often add rich eye color harmony to green or hazel eyes.
Should you have brown eyes, almost anything works, so you can lean into bronze, navy, or rose for a look that feels like you.
Next, match the shade to your skin depth.
Softer tones feel easy and friendly, while deeper colors add drama without shouting. In cases where in doubt, choose one matte and one shimmer in the same family. That way, you’ll fit right in.
How to Apply Eyeshadow Step by Step?
Once your lids are prepped and you’ve picked your shades, you can start building the look in a simple order that keeps things neat and beginner-friendly.
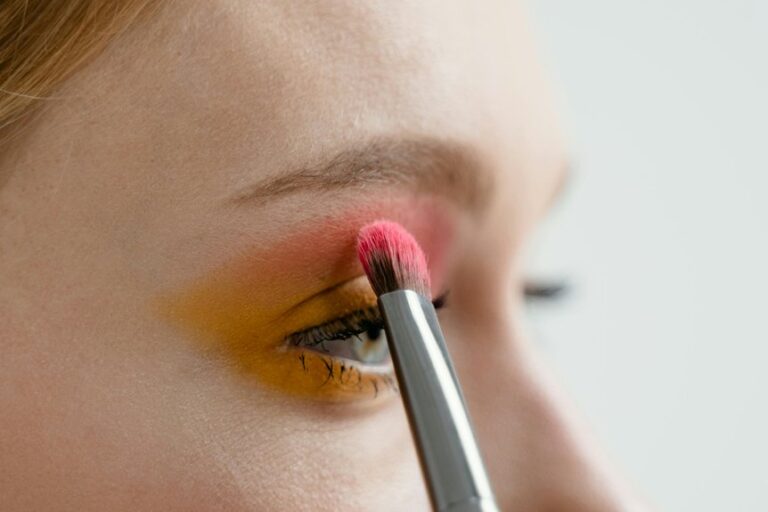
First, sweep a light matte shade through the crease for soft crease placement. Then, use a medium color on the outer lid and press it toward the lashline definition you want. Next, pack your main lid shade from the center inward with a flat brush. After that, tap a deeper shade on the outer corner to shape the eye.
- Keep your brush light and steady.
- Use small motions for better control.
- Add shimmer to the center lid.
- Touch the inner corner for brightness.
- Check both eyes for balance.
If you pause between steps, you’ll feel more in control, and that calm, practiced vibe always shows.
Blend Eyeshadow for a Soft Finish
Soft eyeshadow blending is what turns a basic look into something smooth, gentle, and polished, and you can do it even though you’re still learning.
Start with a clean fluffy brush and use light, back-and-forth blending techniques to soften the edges where colors meet. Keep your hand relaxed, because a gentle touch helps the shadow move instead of streak. Whenever one spot looks too dark, sweep over it with a little more powder on the brush, then blend again.
You’re aiming for soft diffusion, not a heavy block of color. Work in small circles, then check both eyes together so they match. With patience, you’ll make the shades melt into each other and feel like they belong there.
Add Crease and Outer-Corner Depth
To give your eye look more shape, start adding a crease shade and a bit of outer-corner depth. You don’t need fancy skills, just a steady brush and a soft hand. This step helps your eyes feel defined, warm, and part of the look you’re building.
- Pick a matte shade a little darker than your lid color.
- Tap off extra powder so you stay in control.
- Sweep crease shading back and forth in the fold.
- Focus outer corner depth where your eye needs lift.
- Blend the edge gently so it looks natural, not harsh.
If your eyes are hooded, keep the color a touch higher. For deeper-set eyes, stay light and build slowly.
You’re not chasing perfection here. You’re just giving your eyes a little shape that feels like you.
Apply Shimmer or Glitter Easily
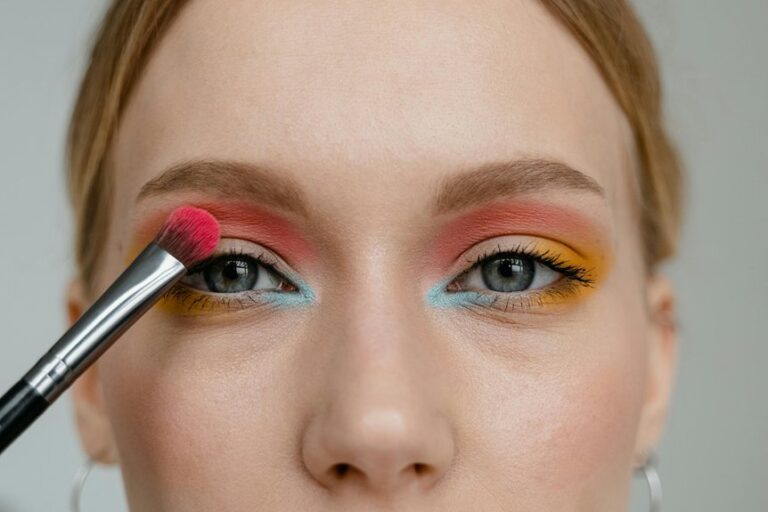
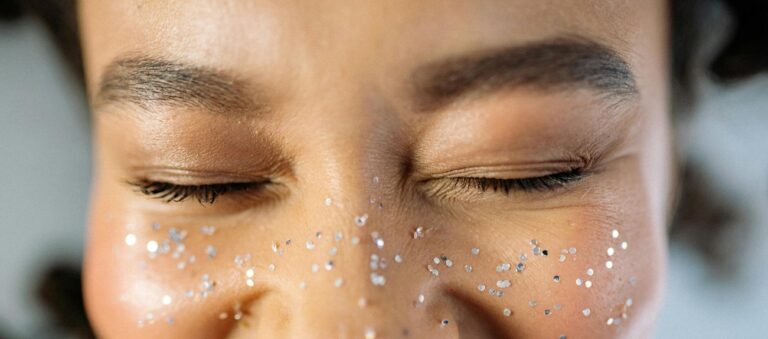
Now that your crease and outer corner have some shape, you can bring in shimmer or glitter without making the look feel messy. Keep your shimmer placement on the center of the lid or the inner half, then tap it on with a flat brush for a smooth finish. Should you want sparkle, press it over a sticky base so glitter adhesion stays strong and the particles don’t wander.
| Finish | Best spot | Brush |
|---|---|---|
| Soft glow | Inner lid | Flat brush |
| Bold shine | Center lid | Shader brush |
| Glitter pop | Top of lid | Finger |
You’re not trying to cover everything, just brighten the eye so it feels polished and friendly. Build slowly, and stop once it looks like you belong in the room, not like your lids escaped a craft drawer.
Fix Common Eyeshadow Mistakes
You can fix most eyeshadow mistakes with a few calm touch-ups, so don’t panic whenever the color looks uneven or a little messy.
Softly blend harsh edges, tap away extra fallout, and add a bit more pigment where the shadow looks patchy.
With the right brush and a light hand, you can smooth everything out and make your eye look feel polished fast.
Blend Harsh Edges
When your eyeshadow looks a little rough around the edges, don’t panic, because that’s one of the easiest beginner mistakes to fix. You can smooth it out via gently softening sharp edges with a clean fluffy brush. Small circles help you blur the color where one shade meets another, and that keeps the look polished.
- Use light pressure so you don’t move color too far.
- Focus on the crease and outer corner initially.
- Tap off extra powder before you blend.
- Add a little transition shade should the edge feels too strong.
- Keep moving the brush until the line fades.
This step matters because diffusing visible lines helps your eye look calm, blended, and finished, like you meant to do it all along.
Reduce Fallout
Fallout can turn a pretty eyeshadow look into a messy one fast, but it’s easy to keep it under control with a few smart habits. Start with tapping your brush before it touches your lid, so extra powder falls away initially. Then, keep a tissue or cotton pad under your eye while you work on deeper shades. That simple step helps you stay in the same makeup crew, not the cleanup crew.
Provided you love baking eyeshadow, place a light layer of loose powder under the eye to catch flakes, then brush it off after. For extra fallout control, use a small, dense brush for packing color, and build slowly instead of loading too much at once. A gentle hand keeps your base neat and your confidence high.
Correct Uneven Pigment
Uneven pigment can make even a nice eyeshadow look feel patchy or streaky, but it’s usually easy to fix with a steadier method.
Firstly, stop adding more shade right away, because that can make patchy application worse. Instead, use a clean fluffy brush and soften the edges with small circles. Then add a tiny bit more product only where the lid looks light.
- Tap off extra shadow before you reload.
- Press color on, don’t rub it.
- Blend from the outer corner toward the center.
- Use a lighter progress shade for color correction.
- Check your lid in different light.
If one spot still looks bold, dust a little translucent powder nearby, then blend again. You’re not messing up; you’re just evening things out like the rest of us.
Make Eyeshadow Last All Day
If you want your eyeshadow to stay put from morning coffee to late-night plans, the key is smart prep before you even touch color. Start with clean lids, then smooth on primer from lash line to brow bone. This gives your shadow grip and helps it wear like it belongs there.
Next, tap on a little translucent powder so the base feels dry, not sticky. If you prefer a shortcut, use concealer plus powder, but primer usually lasts better. For extra staying power, choose long wear formulas and press them on in thin layers.
Then mist lightly with the setting spray method after you finish, not before. That final step helps lock everything in, so your look stays fresh without fuss or midday patchiness.
Simple Eyeshadow Looks for Beginners
You can keep simple eyeshadow looks easy by starting with a neutral everyday shade that softens your eyes without feeling heavy.
A one-shade wash gives you a quick, polished look, and it’s perfect when you desire makeup that looks put together in minutes.
Once you feel comfortable, you can build from that soft base into slightly deeper tones for more shape.
Neutral Everyday Looks
A neutral everyday eye look is one of the easiest ways to feel polished without looking overdone, and it’s perfect whenever you want makeup that works at school, at work, or just for a normal day out.
You can build it with neutral matte tones that make you look awake and put together, even though you’re rushing. Start with primer, then sweep a soft beige shade through the crease so your eyes look natural and defined. For quick office makeup, add a warm brown to the outer corner and blend it softly.
- Use one fluffy brush for easy blending.
- Keep the lid shade close to your skin tone.
- Press color on lightly, then blend.
- Add a tiny shimmer only when you want.
- Finish with mascara for a clean, friendly look.
One-Shade Wash Techniques
Because a one-shade wash keeps things simple, it’s a great place to start whenever you want eye makeup that looks soft, quick, and still put together. You can sweep one color over the lid with a fluffy brush, then soften the edges with small circles.
This monochrome shadow placement gives you a clean finish without extra effort, so you still feel polished. Whenever you want a lighter effect, choose a satin or matte shade and use sheer lid tinting instead of heavy packing.
Tap on a little more near the lash line for depth, then blend upward for a smooth fade. Because whenever you’re using one shade, you can match it to your mood, your outfit, or your favorite “I tried” face with ease.
Try Different Eyeshadow Finishes
When your base is set, the finish you choose can completely change the mood of your eye makeup. You don’t have to guess which one fits you. Consider of matte vs shimmer as calm versus bright, and satin vs metallic as soft glow versus bold shine. Each finish helps you show a different side of yourself, so you can match your look to your day and still feel like you belong in the room.
- Matte shades give you a smooth, low-key look.
- Shimmer adds light and makes lids pop.
- Satin gives a gentle glow without too much sparkle.
- Metallic brings strong shine for a standout effect.
- Mixing finishes can make your eyes look more balanced.
Try one finish initially, then add another where you want a little extra life.
Practice and Build Confidence
Practice is where eye makeup starts to feel less scary and more like your own style. You don’t need perfect symmetry on day one, because every try teaches you something useful. Start with practice consistency using the same brush and shades a few times a week. That steady rhythm helps your hands relax and your eyeshadow look smoother.
Then, focus on simple motions to build brush control, like soft circles in the crease and gentle pats on the lid. When one side looks messy, breathe and blend again. You’re learning, not auditioning for a crown. Small wins matter, and each one helps you feel more at home in front of the mirror.