Getting smooth makeup starts long before foundation touches the skin. The order of products truly changes texture, longevity, and finish. Prepping, layering thoughtfully, and letting each product settle prevents patchiness and cakiness. One often-rushed step-proper skin prep-makes the biggest difference.
This introduction explains that a smart routine and correct product sequence create a cleaner, longer-lasting look while highlighting skin prep as the pivotal step.
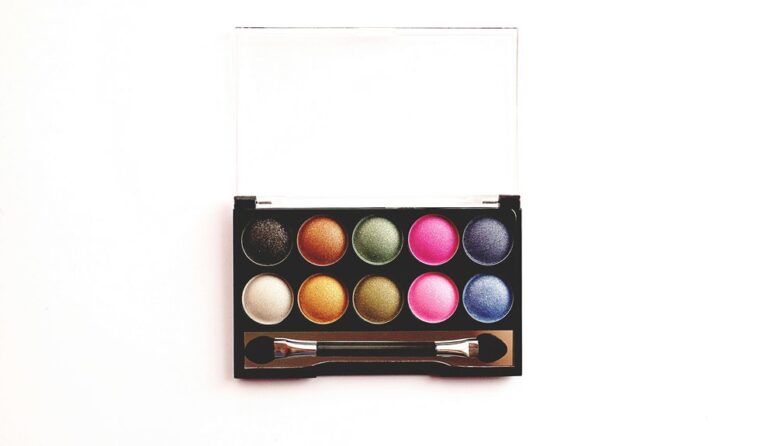
Makeup Application Order: What Goes First?
Before you reach for foundation or concealer, your makeup order should start with clean, well-hydrated skin, because that base does most of the heavy lifting for the rest of your look.
Then move to primer if you want extra grip or a smoother finish. Give your skincare routine timing about 30 to 60 seconds so each layer settles before the next one. That pause helps product compatibility and keeps your makeup from slipping or pilling.
After that, apply foundation, then concealer where you need more coverage. From there, add powder, bronzer, blush, and highlighter in that order. Finish with eyes, lips, and setting spray.
Whenever you follow this flow, you don’t fight your products. They work together, and you look like you belong in your own mirror.
Prep Skin for Smoother Makeup
A smooth makeup look starts with skin that feels calm, hydrated, and ready, so give your face a little care initially. You’re not alone whenever your makeup sometimes catches on dry patches; clean skin prep helps you start strong. Wash gently, then pat dry so you keep comfort and avoid tugging. After that, give your skin a hydration uplift with serum and moisturizer.
- Use a gentle cleanser.
- Add a hydrating serum.
- Seal in moisture.
- Wait a minute before makeup.
This simple routine helps your face feel soft and smooth, so products move better later. Whenever your skin feels cared for, you can step into the day with more confidence and a finish that looks like it belongs on you.
Apply Primer, Foundation, and Concealer
Once your skin feels hydrated and calm, primer can step in and help everything sit better. You want a primer texture that matches your skin, so choose silky for oily spots or creamy for dry areas. Smooth a thin layer over the center of your face, then let it settle for a moment.
Next, tap on foundation from the middle outward, and blend it into your jaw so the color feels natural and you look like you belong in every photo. After that, use concealer where you need a little extra help. Place it under your eyes and on blemishes, then blend gently. Keep concealer coverage light at first, because you can always add more where needed.
How to Set Makeup With Powder
Now that your foundation and concealer are in place, powder helps lock everything down so it stays neat and fresh. You don’t need much; a light touch keeps your skin looking like you, not a mask. Use a fluffy brush for gentle setting, then target powder placement where shine shows up earliest.
- Sweep it over the center of your face.
- Press a little on the nose and chin for oil control.
- Blend softly around the under-eye area.
- Skip heavy layers so your makeup still feels breathable.
If you want extra hold, tap on a thin second layer only where needed. This simple step helps your base stay smooth, calm, and ready for the day with confidence.
Layer Blush, Bronzer, and Highlighter
You can bring your face to life by placing blush where your cheeks naturally lift, so your color looks fresh and happy, not heavy.
Then sweep bronzer where the sun would warm your skin, adding soft depth around your forehead, cheeks, and jawline.
Finish with highlighter on the high points of your face, and let that last glow catch the light without taking over.
Blush Placement Basics
Blush placement works best whenever you consider your face as a full map, not just one spot, because bronzer, blush, and highlighter each do a different job.
For cheek placement, smile lightly and set color on the apples, then sweep it upward toward the temple. That lift helps you look fresh, not flat. Keep your blush intensity soft at outset; you can always add more whenever you want a brighter, friendlier glow.
- Start near the center of the cheek.
- Blend edges so the color melts in.
- Keep highlighter above the blush line.
- Match placement to your face shape.
Whenever you place blush well, the whole look feels balanced, and you fit right in with that polished, easygoing vibe everyone loves.
Bronzer Warmth And Depth
With your blush softly placed, bronzer steps in to warm the face and add depth where the skin naturally needs a little shape. You’ll get the best bronzer placement after you sweep it lightly across the temples, under the cheekbones, and along the jaw. Keep the color soft, especially provided your skin has warm undertones, so the finish looks believable, not muddy.
Then blend edges with small circles so the look stays smooth and friendly. After that, your blush can still shine through without losing its lift. Provided you use cream products, press bronzer on first, then let everything settle before powder.
This order helps your makeup feel connected, like it all belongs together, which is exactly the goal.
Highlighter Final Touch
After bronzer has warmed the face, highlighter steps in as the final touch that makes everything feel polished and alive. You want it where light naturally hits, so keep highlight placement on the tops of your cheekbones, brow bone, and cupid’s bow. That small shift lifts your look and helps you feel put together without doing too much.
- Use a cream for a softer sheen.
- Tap powder highlighter for more sparkle.
- Keep glow control by starting light.
- Blend edges so it joins blush smoothly.
When you layer after blush and bronzer, your face looks balanced, not busy. Should you catch yourself going a little extra, just soften it with a clean brush. You still get that friendly, lit-from-within finish, and you’ll fit right in with any crowd.
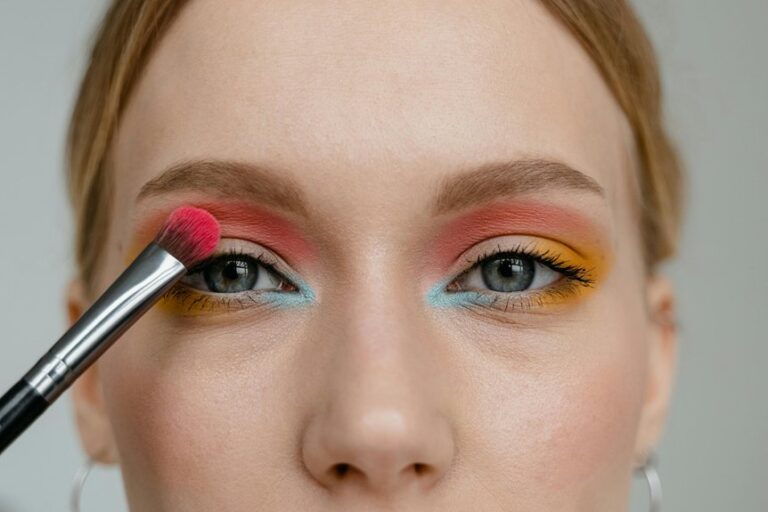
Build Eye Makeup in the Right Order
Start by applying primer to your lids after skincare so shadow grips better and wears longer.
Then blend your eye color first, because smooth layers make the whole look cleaner and easier to control.
After that, add liner and mascara to define the shape without fighting fallout or patchy color.
Primer Before Shadow
Whenever you want your eye makeup to look smooth and last longer, primer should come before shadow because it gives your lids a clean, even base. You’re not just adding another step; you’re giving your look a steady start that helps you feel put together with the rest of your crew. Use a thin layer of eye primer, then let it settle for a few seconds so your shadow base grips better. That little pause matters.
- It helps color show up more clearly.
- It keeps shadow from sliding around.
- It smooths tiny texture on your lids.
- It gives you a better initial layer for a polished finish.
Blend Then Define
To build eye makeup that looks polished instead of messy, you want to blend first and define second. Start with your shadow and use a fluffy brush to blend softly across the lid and crease. This keeps color smooth and helps you feel like the look is already working with you.
Next, add depth where you want it, not everywhere. After the shape feels even, take a smaller brush or liner and define edges along the lash line or outer corner. That order matters because harsh lines are easier to fix after the base is soft.
Whenever one side looks stronger, lightly blend again, then sharpen only the places that need it. You’ll get cleaner eyes, less stress, and a finish that feels put together, not too perfect, just yours.
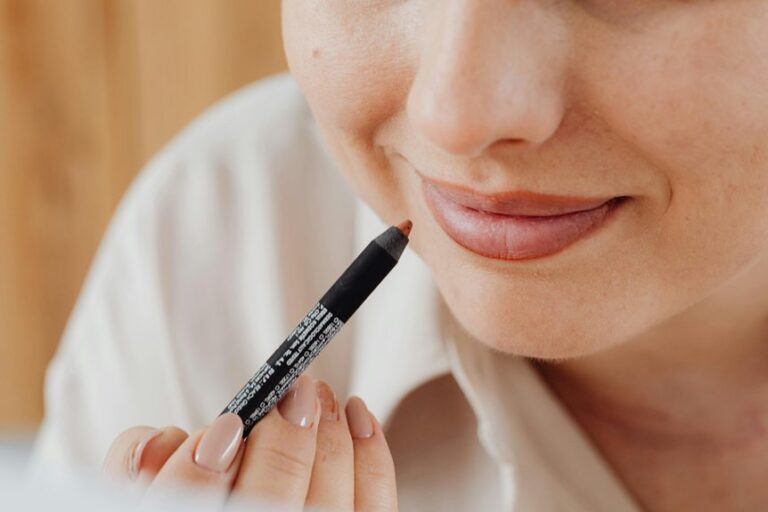
Finish Lips, Brows, and Setting Spray
With your base in place, the last details can pull the whole look together and make it feel polished instead of unfinished. Start with your lip finish, choosing gloss for shine or balm for a soft look that still feels like you. Then shape your brows with light strokes and brow setting gel so they stay neat, natural, and part of the same polished story.
- Trace lips initially, then fill them in.
- Brush brows upward before setting.
- Choose a finish that matches your mood.
- Keep your touch light for balance.
After that, mist setting spray over your face in an X and T pattern. It helps everything settle and makes you look ready to join the room with confidence.
Avoid Caking, Creasing, and Patchiness
Why does makeup sometimes go from smooth to heavy so fast? You can stop that shift by working in thin layers and giving each one a moment to set.
Start with skin that feels hydrated, not slick, because dry patches grab product and oily spots can slide it around.
Next, match formulas for product compatibility, like cream over cream or powder over powder, so everything blends with less fight.
Then use texture control by pressing, not dragging, foundation and concealer.
If you see creasing, tap it out before adding more. If you notice patchiness, stop and warm the product on your hand first.
A light powder finish can lock things in without turning your face into cake city.