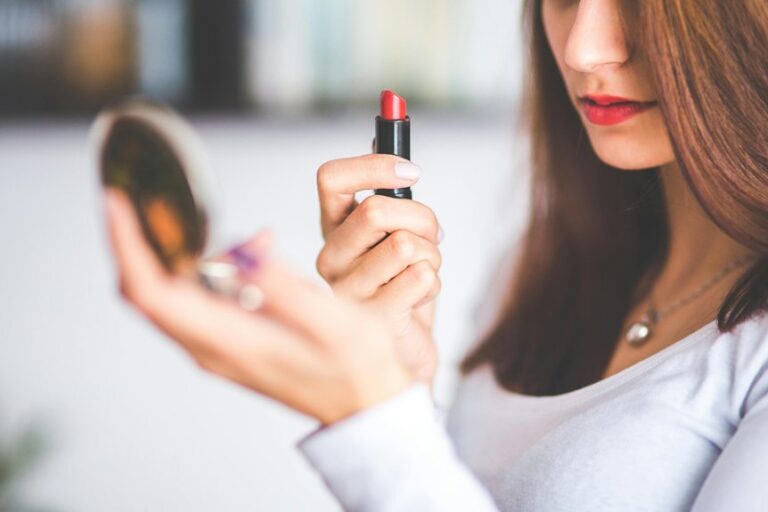
Lipstick can lift a whole look, but small mistakes can turn a smooth finish into a mess fast. Flakes, faded color, and feathering beyond the lip line are common and fixable. Most problems start before the tube touches the lips, with prep and product choice playing big roles. Learn quick, practical fixes to keep color smooth, long-lasting, and true to shape.
Common Lipstick Mistakes to Avoid
Upon your lipstick looks patchy, fades too fast, or bleeds outside your lip line, the problem usually starts before the color even touches your mouth. You could skip lip care basics, reach for a formula that fights your lips, or ignore lipstick application timing after balm. Dry flakes grab pigment, so the finish looks uneven and tired.
Whenever you choose a matte shade on unsoftened lips, it can cling and make every line louder. You can avoid that via checking your lip condition initially, then matching the formula to your day. Next, wait a few minutes after lip balm so the color grips better, not slicker. Whenever you handle these common lipstick mistakes, your look feels more polished, and you fit right in.
Skipping Lip Prep Before Applying Lipstick
Provided here is a version that follows your replacement rules while keeping the text otherwise the same:
if you’ve already been avoiding the common lipstick mistakes, the next place to look is your prep step, because skipping lip prep can undo everything before the tube even opens. You want your lips to feel smooth, calm, and ready, so start with a gentle wipe or light scrub to lift flakes without overdoing it. Then use lip balm layering: apply a thin coat, let it sink in, and blot off the shine so lipstick grips better. Pay attention to lip mask timing too, because an overnight mask works best when you give it time before color. Once you prep this way, your lipstick glides on evenly, feels better, and looks like it belongs on you, not like it’s fighting for space.
Choosing the Wrong Lipstick Formula
Whenever you pick the wrong lipstick formula, even a beautiful shade can turn into a frustrating mess, because the texture has to match both your lips and your routine.
You might love a bold matte, but if your lips feel dry, it can look harsh and uncomfortable. On the other hand, a creamy bullet can feel gentle, yet it may fade fast when you need finish longevity. Gloss can also miss the mark if you want clear color in one swipe.
Applying Too Much Lipstick
Too much lipstick can turn a polished look into a messy one fast, because extra product settles into lines, smears past your lip shape, and can even make your lips look heavier than they are.
You don’t need a thick coat to look put together. Instead, start with a light swipe, then press your lips together and add more only where you need it.
That gives you overapplication control and keeps the color smooth. Whenever you use precise layering, you can build bold color without crowding the mouth area.
Whenever the tube leaves a lot behind, tap off the excess before you apply it again. A thinner finish also feels lighter, so you can smile, talk, and stay confident without worrying that your lipstick is doing too much.
Skipping Lip Liner and Edge Definition
When you skip lip liner, your lipstick can lose its shape fast and start looking messy around the edges.
You can fix that with tracing your natural lip line initially, which helps define your shape and gives your color a cleaner finish. It also keeps lipstick from bleeding into fine lines, so your look stays neat for longer.
Lip Shape Definition
Even a beautiful lipstick can look messy when you skip lip liner and edge definition, because the color has nowhere clear to stop. You can fix that through tracing your natural outline initially. This gives your lips lip shape balance and better lip proportion improvement, so the color looks customized to you, not borrowed from someone else.
Then, fill in the corners with light strokes to keep the shape even and polished. After that, blend the edge softly inward, not beyond the line. That small step helps your lips look cleaner, fuller, and more confident. Upon you define the border, you guide the eye to your best features, and your lipstick feels like it belongs on your face, not fighting it.
Preventing Lip Color Bleed
Lip color bleed can turn a polished look into a fuzzy mess fast, but a little planning keeps that from happening. You fit right in as your lip line stays crisp, not blurry.
- Use lip bleed control by tracing your natural edge with liner.
- Pick a shade that matches your lipstick, then outline initially.
- Fill the lips lightly so color grips the skin.
- Press lipstick on top, then check corners for feathering prevention.
This simple step gives you a clean frame and helps your color stay where you placed it.
As you skip edge definition, bold shades can creep into fine lines and soften your shape. So take a calm minute, steady your hand, and protect that finish.
You don’t need perfection, just a defined line that feels neat, confident, and fully yours.
Applying Lipstick on Dry, Flaky Lips
Dry, flaky lips can make even your favorite lipstick look patchy, but you can fix that with the right prep. Start with gentle lip exfoliation, using a warm damp towel or a soft scrub to lift dead skin. Don’t rub hard; you’re polishing, not sanding a table.
Next, smooth on lip balm prep and let it sink in for a few minutes. Then blot away any extra moisture so your color can grip, not slide. Should your lips still feel tight, drink water and add a thin layer of balm before makeup.
This simple routine helps lipstick glide on evenly, keeps flakes from showing, and makes your look feel polished and comfortable. Upon your lips feeling cared for, your whole makeup vibe feels more confident.
Choosing the Wrong Lipstick Shade
You can wear the prettiest lipstick, but if the shade clashes with your skin undertone, it can look off fast.
The right color should flatter your complexion and fit the moment, whether you’re heading to work, dinner, or a bold night out.
When a shade washes you out or makes your lips seem smaller, it can dull your whole look instead of lifting it.
Skin Undertone Match
Why do some lipstick shades look incredible in the tube but seem off once they hit your lips? You’re probably missing undertone harmony. While your lipstick fights your skin’s natural tone, the color can look harsh, dull, or too bright. That clash breaks the sense of complexion contrast, so the shade doesn’t feel like you.
- Check whether your skin leans warm, cool, or neutral.
- Try a rosy shade for cool undertones.
- Reach for peach or coral while you’re warm.
- Examine nude colors in natural light.
Once you match the undertone, the color blends with your face instead of stealing the show. That small shift helps you look polished, confident, and part of the moment, not stuck beside it.
Occasion-Appropriate Colors
A flattering lip color can still miss the mark when it doesn’t fit the moment, and that’s where occasion matters just as much as undertone. You can love a bold berry, but it could feel too loud for event dress codes that call for soft polish.
For weddings, interviews, or office days, choose shades that help you blend in with ease and still feel like you. Then shift with the setting. Seasonal color themes also guide you well: warm corals can feel fresh in spring, while deeper wines suit cooler months.
Whenever you’re unsure, match the mood of the room, not just your outfit. That small choice helps you look thoughtful, confident, and welcome wherever you go, without trying too hard.
Avoiding Washed-Out Shades
If your lipstick looks pale, gray, or oddly flat, the problem is often the shade, not your face. You’re not missing glam; you just need better undertone contrast and brightness balance.
- Pick warm shades where your skin glows golden.
- Choose cool roses or berries where your skin runs pink.
- Check color in daylight, not store lights.
- Skip pastels that drain your lips where you want life.
Once you match the shade to your undertone, your lips look fuller and more alive. And once the brightness fits your complexion, you look like you belong in every room, not like the lipstick walked in alone.
A good shade should wake up your face, not whisper apology.
Skipping the Blotting Step
Whenever you skip it, extra product stays on top of your lips and can lead to color transfer on cups, teeth, and even your favorite collar.
You don’t need a fancy trick here, just a clean tissue and a gentle press.
That small pause also improves makeup longevity, so your shade stays smoother and more even.
Should you want a polished look that still feels like you, blot once after the initial coat, then add a light second layer whenever needed.
It’s a tiny habit, but it helps your lipstick look put together, not like it raced out the door.
Forgetting Lipstick Touch-Ups During the Day
Touching up your lipstick during the day can make the difference between looking fresh and looking like your color gave up halfway through lunch. You deserve that polished feeling, even after coffee, snacks, and long chats. Keep touch up essentials in your bag, so you’re never stuck with faded edges or patchy color.
- Carry your lipstick shade and a small mirror.
- Blot first, then add a thin layer.
- Use a liner pencil for worn corners.
- Plan a quick midday lip refresh after eating.
When you reapply, you protect the look you worked for and stay confident with your group. A fast touch up keeps your makeup neat, and it helps you feel like you still fit the vibe.
This tiny habit can save your whole face.