Want fuller lashes without heaviness? Start with clean, curled lashes and build mascara in thin layers rather than one heavy swipe. Match the wand shape to your eye and press from root to tip, focusing extra on outer corners and sparse areas. Small technique tweaks make a noticeable difference in natural-looking volume.
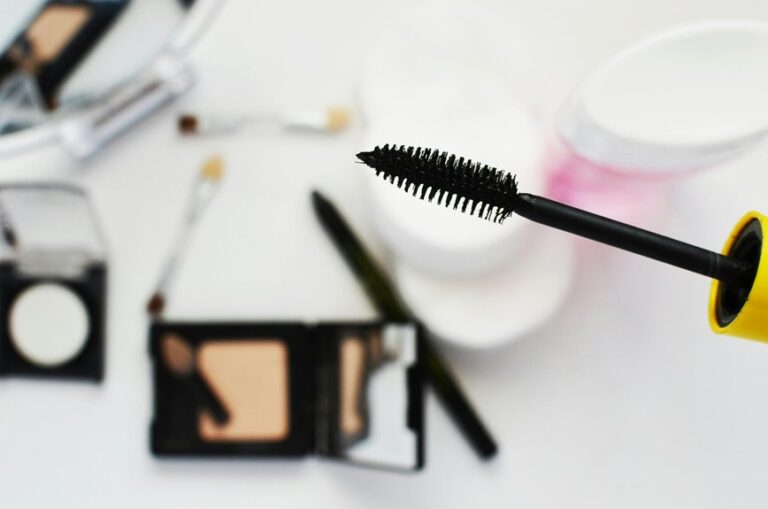
Choose a Mascara Formula for Fuller Lashes
Since the instruction asks to rewrite the text by replacing only specific words, here is the modified version:
If you want your lashes to look fuller, the mascara formula matters just as much as the wand. You want a rich, buildable formula that grips each lash and adds depth without clumping.
If you need all-day wear, waterproof mascara can hold the curl and stay put through humidity, sweat, or a long day out with your people. If you prefer easy removal, tubing mascara wraps each lash in tiny tubes, so your lashes look separated and defined.
For the best fullness, look for formulas with volume-building waxes and dark pigments. You can also choose one that feels light, because heavy mascara can flatten your look fast. When you pick the right formula, you give your lashes a fuller finish that still feels comfortable and natural.
Prep Your Lashes Before Applying Mascara
Start with a clean lash line, because leftover makeup and oil can keep mascara from gripping well.
Then curl your lashes before coating them so they lift right away and open up your eyes.
A light lash primer can also help mascara stick better and look smoother, so your lashes get a stronger, fuller finish.
Clean Lash Line
A clean lash line gives your mascara a much better base, and it can make a big difference in how polished your eyes look. When you focus on lash hygiene, you help each coat go on smoothly instead of clumping around old residue.
Initially, use gentle eye makeup removal so no shadow or liner stays near the roots. Then wash your face with a soft cleanser and rinse well, because leftover oils can dismantle mascara fast.
Provided that you wear a creamy remover, swipe the area again with a clean cotton pad. After that, let your lashes dry fully and avoid touching them.
This simple step helps you feel put together, and it keeps your makeup looking fresh. You’ll notice cleaner definition, fewer flakes, and a softer finish that fits right in with your everyday routine.
Curl Before Coating
Once your lash line is clean, curling your lashes before mascara can give your eyes an instant lift and make every coat look neater. You’ll fit right in with that wide-eyed look when you time it well and keep curler heat safety in mind.
| Step | Why it helps | Quick tip |
|---|---|---|
| Warm curler | Sets a softer bend | Check heat initial |
| Place at base | Builds lift from root | Squeeze gently |
| Hold 5 seconds | Shapes the curl | Don’t rush lash curl timing |
After curling, go straight to mascara so the shape stays crisp. Should you pause too long, lashes can fall flat again. Use a clean curler, avoid pinching skin, and work slowly. With this small prep, your lashes look fuller, and you feel like part of the polished crowd.
Primer For Grip
With your lashes already curled, the next step is to give mascara something to hold onto, and that’s where primer helps. You sweep on a thin coat, and it creates mascara grip so the color clings evenly instead of slipping. That extra product hold also helps your lashes look fuller, which makes your whole routine feel a little more polished and a lot more like you belong in the “I woke up like this” club.
Let the primer set for a few seconds, then move in with mascara while it’s still tacky. Should your lashes be fine or straight, primer can make each swipe count. It also keeps clumps in check, so you get cleaner separation and a softer, lifted finish that feels easy to wear all day.
Pick a Wand That Separates and Lifts
Because the wand does so much of the heavy lifting, picking one that separates and lifts can change the whole look of your lashes.
You want a wand shape that matches your eye, so it can reach tiny inner hairs and fan out the rest. Look for brush spacing that leaves room between bristles, since that helps each lash stay defined instead of clumping together. A slimmer tip gives you control near the corners, while a curved body can help nudge lashes upward with less effort.
Once you choose the right tool, you don’t have to fight for a fuller look. Instead, you can build soft height and clean separation, and your lashes can feel like they belong in the lineup too.
Curl Your Lashes First
Now that your wand can lift and separate, give your lashes a quick curl before mascara touches them. This lash curl technique helps your eyes look more open and lets you feel polished with less effort. Comprehending eyelash curvature basics matters because a gentle bend creates lift without crimping or pain.
- Warm the curler slightly in your hands.
- Place it close to the lash line.
- Squeeze softly for a few seconds.
- Move outward for a natural shape.
- Check for even curl on both eyes.
When you curl initially, you build a shared beauty rhythm that feels easy and familiar. You’re not chasing perfection; you’re framing your lashes so they support each other. Keep your touch light, and your lashes will thank you with a fuller, friendlier look.
Apply Mascara From Root to Tip
Glide the mascara wand to the base of your upper lashes and press it there for a brief moment, then pull it slowly through to the tips.
This lash application technique helps you coat every lash in one smooth move, so you look polished and put together with less effort.
Keep your hand steady and follow your natural lash line.
Whenever you start at the root, your mascara placement strategy gives the illusion of more depth near the eye, which makes your lashes seem fuller without extra work.
Should you miss a few fine hairs, just return to the base and sweep upward again.
You’re not alone whenever this takes practice.
With a calm pace, you can build a clean, even look that feels easy, flattering, and totally yours.
Build Volume Without Clumping
To build volume without clumps, you’ll want to start with thin coats so each layer grips cleanly.
Then, use a spoolie between coats to separate the lashes and keep them soft-looking.
This simple rhythm helps you add fullness without turning your mascara into a sticky mess.
Layer Thin Coats
A few thin mascara coats can give you the soft volume you want without turning your lashes into a sticky little mess. With thin layering, you control the look and keep every lash in the group visible. Start at the base, then wiggle up through the tips. Let each coat set for a moment, so gradual buildup can do its job. That way, you add shape without losing the clean, lifted feel you love.
- Use a light hand on the wand.
- Focus on the outer lashes for subtle fullness.
- Keep each pass even from root to tip.
- Stop once your lashes still look soft.
- Choose a formula that stays smooth.
Separate With Spoolie
Why let all that careful mascara work end in a clumpy finish? You can save the look with a clean spoolie and a calm hand.
Start right after mascara sets for a few seconds, then use a gentle spoolie technique from roots to tips. This gives you better lash separation and helps each lash stand out instead of sticking together. Whenever you see a thick spot, lift it lightly and comb again.
Next, turn the spoolie a little as you move, so you catch concealed clumps without smudging. You don’t need to press hard; a soft pass works best and keeps volume intact.
With practice, you’ll feel more in control, and your lashes will look fuller, lighter, and neatly defined.
Focus on the Outer Lashes
Whenever you focus on the outer lashes, you can make your eyes look wider, softer, and more lifted without piling on extra mascara.
Start with outer corner emphasis by placing the wand at the base, then wiggle and pull outward. This helps you create an outer lash fan out that feels polished, not heavy.
You’re not chasing drama; you’re building balance that looks flattering in real life and in photos.
- Keep the inner lashes light.
- Angle the wand toward the temple.
- Use short strokes for control.
- Let the tips stay airy.
- Stop before the lashes clump.
That small shift can make you look more awake and put together, like you belong in every room you walk into.
Add a Second Coat to Sparse Areas
If your lashes look a little thin in the middle or along the outer edge, a second coat can fix that fast without making your mascara look heavy.
Initially, wait a few seconds so the first layer sets, then use the wand to press more color onto sparse lash spots. Keep your strokes short and focused, because a targeted second coat works best where you need extra fullness.
You’re not trying to start over; you’re just building in tiny layers. Should one area still look light, tilt the wand and tap it through that section only. This keeps the rest of your lashes clean and soft.
With a little patience, you can blend the new coat so your eyes look fuller, balanced, and naturally lifted together.
Remove Mascara Gently to Protect Lashes
Take off your mascara with a gentle hand, because rough removal can weaken lashes fast.
Gentle removal keeps your eyes comfy and helps your lashes stay full, so you can feel part of a beauty routine that truly cares.
Use a soft cotton pad with micellar water, press it on your closed lid, then wipe down without rubbing. That small habit supports makeup hygiene and cuts breakage.
- Hold the pad on your lashes for a few seconds.
- Wipe from root to tip, not side to side.
- Use fresh cotton for each eye.
- Avoid tugging at stubborn bits.
- Finish by cleansing your face and lash line.
When you treat your lashes kindly, they respond better tomorrow.